Freedom 55 by Francois Vaillancourt, QC, Canada

As a hobby cabinetmaker I have had the pleasure of building various projects from building my bedroom furniture just before I got married 33 years ago to making various medium and small projects for my three kids and friends. I would say that I have wanted to build a small boat or canoe for the past 10 years. A few years ago my wife bought me the Bear Mountain canoe book and from there I elected to build the Freedom 15. It also coincided with my turning 55 and semi-retired so the canoe has unofficially been called Freedom 55.
The build instructions from the book and the detailed information supplied with the layout plans made the build relatively surprise free. As stated, if care and attention is taken to set-up the strongback straight and level and to accurately produce the stations then all the time taken for the preparation will pay off in a trouble-free build. When I laid out the first strip, it contacted the edge of the stations perfectly.
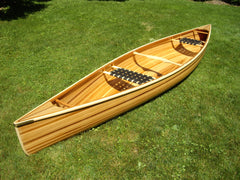
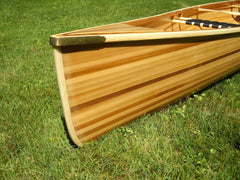
My design is straightforward. I bought all my lumber rough-cut and planned to size myself from 16’ lumber. I laid out the cedar planks in order of color. As I cut every strip I then numbered them to maintain the color trend. Once that was done I inverted end over end every second strip so that the strips at the front and rear of the canoe would alternate in color while the center part would be uniform. I happened to have a short piece of very dark cedar which I spliced and used as a visual feature halfway down the side of the canoe. The inwale is mahogany while the outwale is ash. Those have a single splice as I could only locate 12’ lumber. The decks are a combination of black and light walnut.
I elected to do a staple-less build as I did not want to see all of those little holes and I felt confident that it was within my abilities. The first plank had to be nailed to the stations and from there I glued all the rest as per the instructions. I was able to use various clamping method thanks to the help of the internet and tricks from others who have built before me. After each plank glued I took care to wipe off the excess glue both in and outside of the strip to help with the sanding operation.
As I continued planking and rolled over to the bottom part I neared the point where I should start to plank only one side of the bottom but I did not like the idea of the bottom centerline planks just but glued together. This is when I had my ha! ha! moment and my claim to fame for my own design. I decided to do a herringbone bead and cove joint. This would make it as strong as possible as well as visually appealing. I was able to continue with alternate planks down to the second last plank where I had to do a custom fit of the last two planks together.
The next big hurdle was the application of the fiberglass and resin. I had never done any fiberglass so I looked at this operation with some apprehension. My concerns were not founded. With some help to spread the resin evenly and a dedicated mixer and the slow set of the resin all went very well, again with no surprises. The inside required a bit more work but again with no surprises.
The inwale and outwale came next. I tapered the ends as well as making the scuppers with the router and a couple of simple jigs. The process was clean and quick. I then carved out an ash yoke, again from plans picked up on the web. I also added some wraparound brass trim at both ends of the outer gunwale which I thought gave it a nice artistic look.
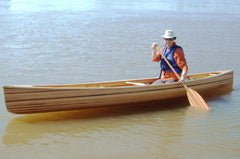
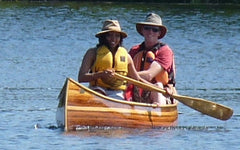
All in all it took about 5 months of part-time work. I did the entire plank machining in late September before the snow and started the actual build of the canoe in mid-December after completed all of the jig and template work. Most of the work was done on my semi-retired 4 day week-ends and was completed May 2nd 2014. Sadly the final weight was 55lbs. I was really hoping to be no more than 50lb but the ash yoke as well as the addition of a couple of handles probably did not help, or maybe too much resin who knows. The canoe was put in the water a couple of weeks later. I can confirm that it paddles very easily. This was a most enjoyable and satisfying project.


