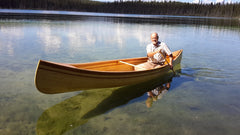
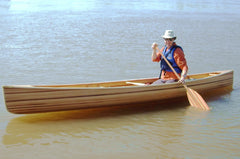
Repairing Seadoggie: A Woodstrip Canoe Builder's Photo Essay by Andrew Cottingham

This is Andrew's second outing on the Bear Mountain blog - for info on the original build, click here.
Story of the fall
We were in fast-moving water on the Credit River, a mistake on my part for not knowing how rocky that river is. We followed a family in an inflatable raft and assumed it would be the best route to take down the river, as they were doing just fine. There was a fallen tree hanging over the water, which the family in the raft was able to duck under. We were not so lucky. The tree was not submerged, so the tree stopped us and the boat continued down the river.
The results weren’t pretty.


So on to the repair! The damage was caused on May 13, and the third coat of varnish applied to the final repair June 15.
I worked on this repair almost every day possible. It only took a month to complete, but I put in a lot more hours than expected. Probably around forty hours of work for me, with many steps taking only a couple hours but followed by an overnight dry time.
First I marked all the delaminated fibreglass with a sharpie:

...and cut away all the damaged/delaminated fibreglass. There is a lesson here that I learned too late.

As you’re cutting away the damaged fibreglass, be VERY CAREFUL not to mark the cedar underneath it. After finishing the repair, I can still see several lines where the old fibreglass was cut away.
These are the dark lines left from the utility knife. I was unable to sand them out, as they are RIGHT where the old fibreglass was cut away. It is basically outlined with a dark mark, exactly where all the old fibreglass was removed.

I cut out all of the damaged cedar and revealed the true shape of the damage.
I used a sharp chisel and a flush-cutting pull saw for most of it, and a utility knife helped reach the odd tight spot. Notice the 6” ruler to show the size. I use the same ruler in several photos as a scale.

These are the pieces removed from the hull. Maybe I’ll use them for something some day or I may just burn them!

These strips are slightly damaged, but it seemed superficial and I didn’t want to cut out any more cedar as the hole was already 12” x 6”. The splits here do not go very deep, probably 1/32”.

I went over the edges of the hole in the boat with a file, sanding block, and chisel to make them all as straight and square as possible. I put extra effort into this step, and it paid off in the end seeing how well the patch fit when it was glued in.


With the lines as straight as I could make them, I glued some old cedar strips together over the outside of the hull to use as the patch.
I masked off any exposed cedar on the existing boat, to avoid glueing the patch to the outside of the boat.

I started the first strip in the middle, as this gave me a good spot to put a couple clamps in and hold it firmly in place. I imagine everyone’s repair would be different, but for me starting in the middle worked best.

I used tape, clamps, sandbags, wedges, really whatever I had to hold these strips in place. I would say it was more difficult to get these pieces to glue snugly together than it was when I built the boat originally. Nothing to staple to, nothing to clamp to – just tape and weights!

I made a wedge to push against the keel, to help hold while the glue dried.

All the strips glued together:

From the inside, I marked the outline of the hole onto the underside of the patch.
At this point I was very happy I made the extra effort to file, sand, and chisel the lines of the hole to be as straight as possible.

I cut out the shape with a flush cutting pull saw, a couple of different hand planes, and a utility knife. Because it is such a delicate piece with a spoon shape to it, I used a couple of sandbags on the bench to hold the work against while I cut it. The weight and curves of the sandbag helped me hold it steady without cracking it.
In this photo you can see a wet spot on the patch because I did in fact crack it while fitting it, and I epoxied the damage back together.

I got a fit that I was happy with, only a couple of gaps. This step took me a few evenings to complete. It was mentally straining to file down an edge, test fit, file, test fit, file…

The Patch finally glued in place. Masking tape was more than enough to get this to hold while the glue dried.

I went over the whole thing with a small block plane to fair the hull and reveal any more gaps. This is the largest gap I had in the patch.

I filled all the gaps and cracks with epoxy/sawdust and then sanded everything smooth.

Ready for fibreglassing:

Wet down to show the grain:

I taped down a 6oz fibreglass cloth patch to avoid any fraying edges. This was a mistake. Taping all sides of the cloth down made it near impossible to squeegee extra epoxy out of the cloth. I should have only taped the one side closest to the keel, and taped a garbage bag or something to catch all the squeegeed epoxy.

I learned from that mistake and patched the inside with the fibreglass cloth taped on one side. This allowed me to squeegee out more epoxy, and have a smoother patch. This is the spot I have to look at when I’m paddling, so I’m glad it turned out better than the outside.

After three coats of varnish using the same exact brand as was originally used – DONE!


There were actually several other repairs, but only one of them damaged the cedar. The rest were just fibreglass cloth patches.


